How To Season A Vertical Smoker – Easy Steps

Purchasing a new vertical smoker can be an exciting experience. You can elevate your grilling game and prepare delicious meals with excellent aromas comparable to restaurant-served barbecues. Using a vertical smoker is basic and easy, but you can’t start straightaway. Prepping the machine in the correct order is imperative to create impressive food and use the smoker for as many years as possible. Seasoning or curing a brand-new vertical smoker before its first use is a crucial task you must not skip. In this post, learn quickly how to season a vertical smoker.
Why Seasoning A New Smoker is Essential?
Seasoning a new vertical smoker is equivalent to laying a foundation for perfect barbecues. Curing a new smoker is crucial for the following reasons:
- Cooking food in your smoker without prepping it invites all sorts of unpleasant odors to accumulate in your food. The machine has absorbed smells from adhesives and paints during manufacturing, that is necessary to eliminate.
- Curing the smoker makes it sturdy to fight against extreme weather conditions and environmental factors that could decrease its life. Keeping the machine in a covered area is advisable, but if you cannot, seasoning will protect it.
- Seasoning your smoker extends its life considerably. It creates a layer of carbon that protects the smoker from rust and corrosion. The protective layer of oil makes the interior perfect for cooking and delays the machine’s aging process.
- The smoker collects debris, like metal shavings, wood splinters, dust, cardboard, etc., through production and shipping. Seasoning removes all that dirt that could ruin the taste or smell of your food from the smoker. Ingesting these containments can also be dangerous for your health; therefore, curing the smoker is essential.
- Running the empty smoker at maximum heat before cooking food burns off the impurities and protects your food from toxic chemicals.
- Running the smoker without food for the first time offers an opportunity to understand how to regulate the smoker’s temperature without ruining the meat.
Seasoning a Smoker
Though the seasoning process may vary depending on the brand and type of the smoker, we have figured a simple and effective method that works for all smokers including drum and pit boss smoker. This step-by-step process works for all vertical smokers and grills. However, we recommend consulting the instruction manual for a safe and seamless seasoning experience.
What Do I Need To Season A Vertical Smoker?
Seasoning your new vertical smoker requires minimal supplies. You may already have the material at home. Here is what you need:
- Brush
- Power washer
- Oil
- Paper towel
The seasoning process briefly involves cleaning the grates with a brush and coating the smoker’s surface with oil. Finally, we heat the smoker, dry it to seal the oil’s protective layer, then wipe it with a paper towel. Here is a detailed breakdown of the process.
Remove The Cooking Grates
The first step is to clean the smoker from the inside thoroughly. Removing the cooking racks is necessary to clean the smoker properly. Pull them out of the smoker and wash with soap and water exhaustively.
Use a wire cleaning brush to scrub the racks and remove residual oil and particles left from the manufacturing process. Rinse them well, wipe them with paper towels, and let them dry. Put them back in the smoker when completely dry.
Clean All The Equipment
Seasoning the smoker involves cleaning the smoker’s interior thoroughly, that includes everything- racks, pans, and grates. Clean all the equipment with water and dishwashing soap. You can also use a mixture of baking soda and water. If you are seasoning an already-used smoker, remove oil, dirt build-up, and grime accumulated in the grates.
Use a soft cloth to scrub if you need to- avoid scratching the surface. Make sure to rinse the remains of soap or degreasing solution with warm water. Don’t forget to clean the inside of the smoker, including the cooking chamber and firebox.
Clean the water pan if it comes with your smoker. Cleaning the smoker from the outside is equally important. The oil, paint, dirt, and debris can coat the exterior of the smoker that you need to power wash.
Air Dry The Cleaned Parts
Air dry all the cleaned equipment or use a soft cloth. Air drying the smoker’s parts is more favorable, but you can use an electric leaf bowler or pat dry with a towel or cloth if you are in a rush. Properly drying the equipment prevents them from rusting.
Coat with Oil
Applying cooking oil generously to your smoker’s interior is a crucial step. Use oil with a high smoke point. Refined oils like canola or vegetable oils have higher smoke points because they are free of impurities and fatty acids. Oils like extra virgin olive oil are not favorable for this process.
The best way to apply oil to your smoker is to use a cooking spray. It creates an even coat of oil to the smoker in less time. You can also season your smoker with bacon grease; the smell of smoke and meat will penetrate the smoker. Wipe the smoker or spray flourless cooking oil once the interior is dry. The oil should evenly coat the entire smoker, including walls, lid, and door, but should not be so much so that it starts dripping down the walls.
Cover the grills, racks, and all the other accessories. Let it rest for ten to fifteen minutes. Remember to protect the heating element and burner from the oil if you are seasoning an electric or a gas smoker. Applying a protective layer of oil to the surface saves it from oxidation and rusting.
Your smoker is prone to rusting as smoking is a slow heat process and releases moisture in the cooking chamber. Also, wood chips release carbon dioxide and water vapors when burned. All of these factors put your smoker at a high risk of corrosion.
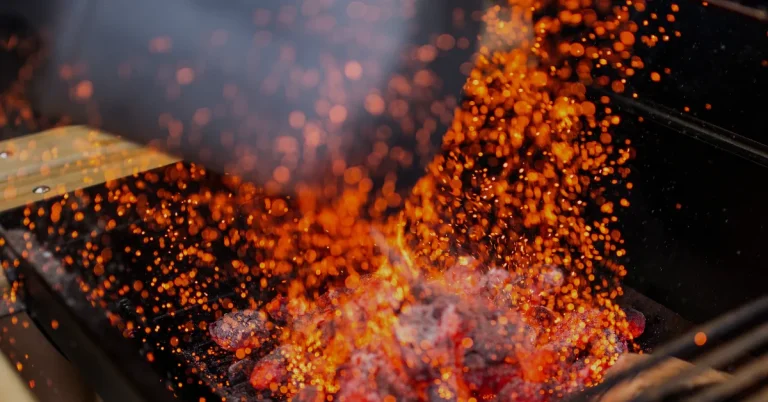
Heat The Smoker
The final seasoning step is to run a cooking cycle on an empty smoker. Consulting your smoker’s instruction manual is critical at this point. It identifies details like whether or not you should open the vents and the maximum temperature to set your smoker for seasoning.
For some smoker brands and models, you have to heat the smoker at the highest temperature, run the smoker for two to four hours, then bring the temperature down. This sequence works for charcoal smokers. Add enough charcoal and wood to last for up to four hours.
Adding wood ensures the metallic odors fade away. Open the door or lid after an hour and let the smoker cool down and burn to ash. Run the electric smoker for an hour or when your grates turn brown from silver at maximum temperature. Fill the hopper of your pellet smoker with wood pellets, set the smoker to the highest temperature, and let it run for an hour.
Adding wood chips during seasoning is not necessary. However, we recommend adding them so you can utilize the seasoning process as a practice session. Remember to maintain a consistent temperature during the heating process.
Keep the temperature around 250 degrees for a few hours for the oil to set into the surface. Add more charcoal if you need to keep the temperature steady. Adding the water pan during seasoning cycle is entirely your choice. You can add water or another liquid, like wine, to infuse fragrance into your smoker.
Wear protective gloves while reassembling the equipment inside the smoker to ensure you do not remove the coating. If you notice traces of oil on the exterior, rub it in to give the smoker an added waterproof layer.
Tips For Seasoning A Smoker
Follow these tips to ensure a seamless seasoning cycle:
- The best oils and fats for seasoning are sunflower oil, canola oil, raw beef fat, coconut oil, flaxseed oil, or lard.
- Season the smoker with a combination of wood chips to infuse aroma in your smoker. As Expert barbecuers, we recommend mixing hickory with apple or mesquite with peach.
- Remember to place the smoker on a level surface before you start seasoning to ensure the oil doesn’t flow to the back or one side.
- Coat the smoker’s interior and grates with oil using a spray bottle. It is quicker and more convenient than brushing the oil.
- Mop it up if the oil has dripped to the bottom of the smoker before you heat it up.
- Ensure the oil doesn’t get to the heating element for an electric smoker.
- Some smokers recommend maintaining the temperature to 250F for two hours and then increasing it to 350F. While, others recommend keeping a high temperature and then bringing it down after a few hours. We usually go with the first one.
Re-seasoning The Smoker
Seasoning the smoker is crucial to prepare for grilling, roasting, and smoking different foods. It is also equally substantial to re-season it after a few uses to remove the grease build-up as it affects the flavor of your food. Wash and clean the smoker inside out, recoat the surface with fats or oil, and heat it to keep it in optimal condition. Remember to clean the smoker after every use and re-season it once every two months.
Wrap up
Seasoning a new smoker is simple and straightforward. A little cleaning and protecting goes a long way! It will enhance the performance of your smoker, protect it from rust, remove unwanted flavors and smells, and increase its lifetime. The effort you put into this process will pay off in mouthwatering meals with extraordinary flavors and aromas.

I’m responsible for managing and coordinating content creation, distribution, and optimization. I’m the former editor-in-chief of PMQ Pizza Magazine and have written for several B2B food publications over the years, including Restaurant Hospitality, Flavor & The Menu, Restaurant Business, National Culinary Review, FSR, Restaurant Startup & Growth, and more.